Table of Contents
In this article, I will take you through the steps to create an app service plan in Azure. To run an app in an App Service, you will always need an App Service plan. It gives you the flexibility to allocate specific apps to a given set of resources and further optimize your Azure resource utilization. This way, if you want to save money on your testing environment you can share a plan across multiple apps.
According to Azure docs, When you create an App Service plan in a certain region (for example, West Europe), a set of compute resources is created for that plan in that region. Whatever apps you put into this App Service plan run on these compute resources as defined by your App Service plan. Each App Service plan defines:
- Operating System (Windows, Linux)
- Region (West US, East US, etc.)
- Number of VM instances
- Size of VM instances (Small, Medium, Large)
- Pricing tier (Free, Shared, Basic, Standard, Premium, PremiumV2, PremiumV3, Isolated)
What is an App Service Plan
An App Service plan defines a set of compute resources for a web app to run.

How to Create an App Service Plan in Azure
Also Read: Deploy Application war file to Tomcat Using Jenkins in 9 Simple Steps
Step 1: Prerequisites
a) You should have a valid Azure Account.
b) You should have a valid subscription.
c) You should have access to create an App Service Plan.
Step 2: Login to Azure Portal
First you need login to below Azure Portal using your valid user account and password. Upon successful login, you will land into Portal Home Page from where you can create all the required resources.
Step 3: Create a Resource
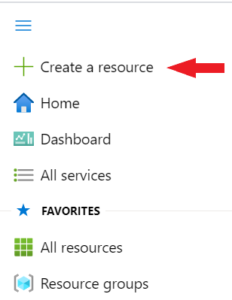
You need to go to Create a resource option present under Portal Menu and then click on it. It will take you to another page where you can search the service and create your resources.
Step 4: Open App Service Plan
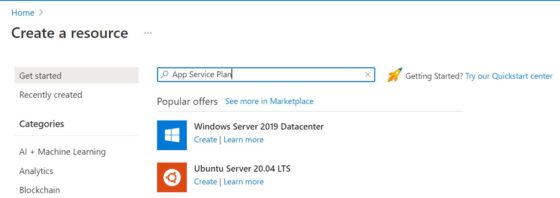
Here you need to search App Service Plan in the search box and then Click Enter.
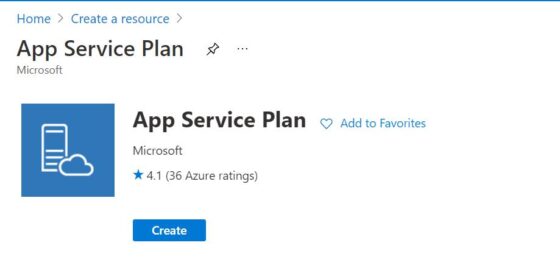
Once you get to the below page, you need to click on Create to start creating app service plan.
Step 5: Create an App Service Plan
Here you will see three different sections to fill. The first one is Basics section where you need to provide Project and App Service Plan details.
a) Basics
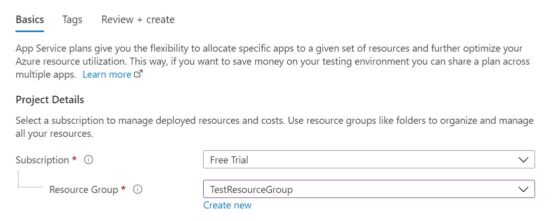
In this section, Subscription will be auto selected but you can change this if you want to use different subscription. Then you need to provide Resource Group for this resource. You can either choose one if you already have it or create new resource group by clicking on Create new. You can check How to Create a Resource Group in Microsoft Azure Cloud to create a resource group.
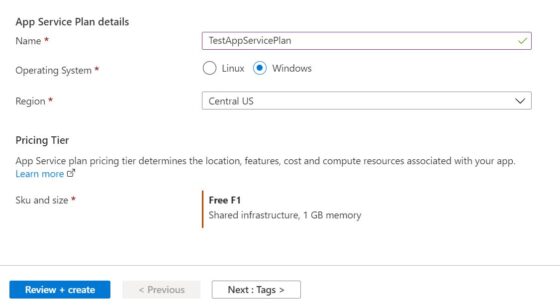
If you scroll down a bit then you will see App Service Plan details to fill. Here I have given the name as TestAppServicePlan and selected Windows Operating System. You can also choose as per your requirement. Then I have chosen Central US as my Region. After that Click on Next : Tags.
b) Tags
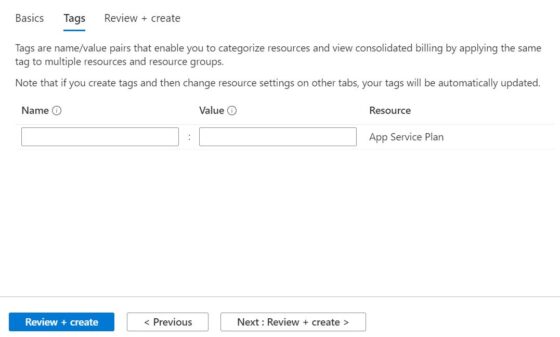
Tags can sometimes be very useful to track the resources. It is basically a name/value pair that helps identify or track consolidated billing of a specific resource. Since I am not using any tags here so I will leave this as blank and click on Next: Review + create.
c) Review+Create
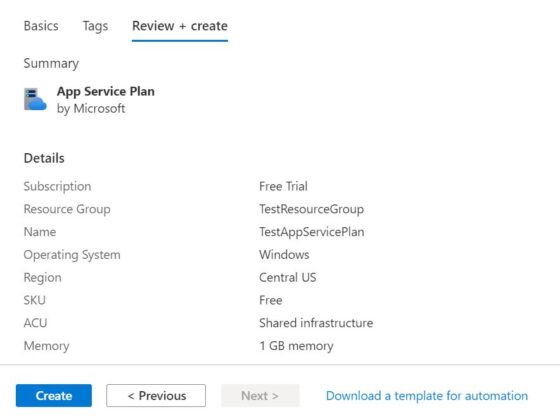
You can check and verify all the details you have filled in previous sections and once done you can Click on Create. This will start the deployment of your resource.
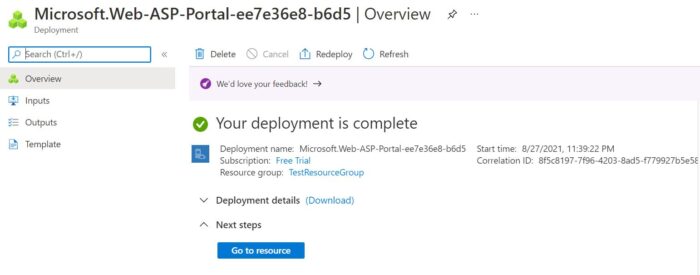
After a while you will see that deployment is completed and it should look like below. This confirms that App Service Plan got created successfully. You can click on Go to resource to check more details about this resource.
