Table of Contents
In this article, we will see how to install apache php module on Ubuntu or Debian based systems. If you are planning to use php with apache server then you would require apache php module to be installed and available in your system for php to work. The Apache PHP module allows the Apache server to interpret and execute PHP code. Without this module, Apache would treat PHP files as plain text and would not know how to execute the PHP code within them.
The module integrates PHP into the Apache server, enabling seamless processing of PHP scripts. It acts as an interface between the server and the PHP interpreter. Here we will see how to install apache php module on Ubuntu or Debian based systems in few simple steps.

How to Install Apache PHP Module on Ubuntu or Debian
Also Read: How to Install K9s (Kubernetes CLI) on Linux
Step 1: Prerequisites
a) You should have a running Ubuntu or Debian Server.
b) You should have sudo or root access to run privileged commands.
c) You should have apt or apt-get utility available in your Server.
Step 2: Update Your Server
From time to time, Ubuntu releases bug fixes and security fixes for all the vulnerable applications. It is utmost important to have all the latest fixed installed in the system along with all latest updates available. This can be done by using sudo apt update && sudo apt upgrade command as shown below.
cyberithub@ubuntu:~$ sudo apt update && sudo apt upgrade
Hit:1 http://security.ubuntu.com/ubuntu focal-security InRelease
Hit:2 https://dl.winehq.org/wine-builds/ubuntu focal InRelease
Hit:3 https://ftp.postgresql.org/pub/pgadmin/pgadmin4/apt/focal pgadmin4 InRelease
Get:4 https://dl.google.com/linux/chrome/deb stable InRelease [1,825 B]
Hit:5 https://download.sublimetext.com apt/stable/ InRelease
Hit:6 http://in.archive.ubuntu.com/ubuntu focal InRelease
Get:7 http://in.archive.ubuntu.com/ubuntu focal-updates InRelease [114 kB]
Hit:8 https://ngrok-agent.s3.amazonaws.com buster InRelease
Ign:9 https://pkg.jenkins.io/debian-stable binary/ InRelease
Hit:10 https://pkg.jenkins.io/debian-stable binary/ Release
Get:11 https://repositories.timber.io/public/vector/deb/ubuntu focal InRelease [4,947 B]
Hit:12 http://ppa.launchpad.net/flatpak/stable/ubuntu focal InRelease
Hit:13 https://d3nt0h4h6pmmc4.cloudfront.net/ubuntu focal InRelease
Hit:14 http://ppa.launchpad.net/gencfsm/ppa/ubuntu focal InRelease
Hit:15 http://ppa.launchpad.net/juju/stable/ubuntu focal InRelease
Hit:16 http://ppa.launchpad.net/libreoffice/ppa/ubuntu focal InRelease
...................................................
Step 3: Install Apache PHP Module
In the next step, you can install apache php module from default Ubuntu repo by running sudo apt install php libapache2-mod-php command as shown below. This will download and install the package along with all its dependencies.
cyberithub@ubuntu:~$ sudo apt install php libapache2-mod-php
Reading package lists... Done
Building dependency tree
Reading state information... Done
The following packages were automatically installed and are no longer required:
libayatana-appindicator3-1 libayatana-indicator3-7 libwxbase3.0-0v5 libwxgtk3.0-gtk3-0v5
Use 'sudo apt autoremove' to remove them.
The following additional packages will be installed:
libapache2-mod-php7.4 php7.4
Suggested packages:
php-pear
The following NEW packages will be installed:
libapache2-mod-php libapache2-mod-php7.4 php php7.4
0 upgraded, 4 newly installed, 0 to remove and 58 not upgraded.
Need to get 1,384 kB of archives.
After this operation, 4,778 kB of additional disk space will be used.
Do you want to continue? [Y/n] Y
Get:1 http://in.archive.ubuntu.com/ubuntu focal-updates/main amd64 libapache2-mod-php7.4 amd64 7.4.3-4ubuntu2.19 [1,369 kB]
Get:2 http://in.archive.ubuntu.com/ubuntu focal/main amd64 libapache2-mod-php all 2:7.4+75 [2,836 B]
Get:3 http://in.archive.ubuntu.com/ubuntu focal-updates/main amd64 php7.4 all 7.4.3-4ubuntu2.19 [9,236 B]
Get:4 http://in.archive.ubuntu.com/ubuntu focal/main amd64 php all 2:7.4+75 [2,712 B]
Fetched 1,384 kB in 2min 56s (7,842 B/s)
Selecting previously unselected package libapache2-mod-php7.4.
(Reading database ... 272730 files and directories currently installed.)
Preparing to unpack .../libapache2-mod-php7.4_7.4.3-4ubuntu2.19_amd64.deb ...
Unpacking libapache2-mod-php7.4 (7.4.3-4ubuntu2.19) ...
Selecting previously unselected package libapache2-mod-php.
Preparing to unpack .../libapache2-mod-php_2%3a7.4+75_all.deb ...
Unpacking libapache2-mod-php (2:7.4+75) ...
Selecting previously unselected package php7.4.
Preparing to unpack .../php7.4_7.4.3-4ubuntu2.19_all.deb ...
Unpacking php7.4 (7.4.3-4ubuntu2.19) ...
Selecting previously unselected package php.
Preparing to unpack .../php_2%3a7.4+75_all.deb ...
Unpacking php (2:7.4+75) ...
Setting up libapache2-mod-php7.4 (7.4.3-4ubuntu2.19) ...

Creating config file /etc/php/7.4/apache2/php.ini with new version
Module mpm_event disabled.
Enabling module mpm_prefork.
apache2_switch_mpm Switch to prefork
apache2_invoke: Enable module php7.4
Setting up php7.4 (7.4.3-4ubuntu2.19) ...
Setting up libapache2-mod-php (2:7.4+75) ...
Setting up php (2:7.4+75) ...
Processing triggers for libapache2-mod-php7.4 (7.4.3-4ubuntu2.19) ...
Step 4: Verify Installation
After successful installation of module, you can verify it by running apachectl -M | grep -i php command as shown below.
cyberithub@ubuntu:~$ apachectl -M | grep -i php
php7_module (shared)
Step 5: Using PHP in Apache Server
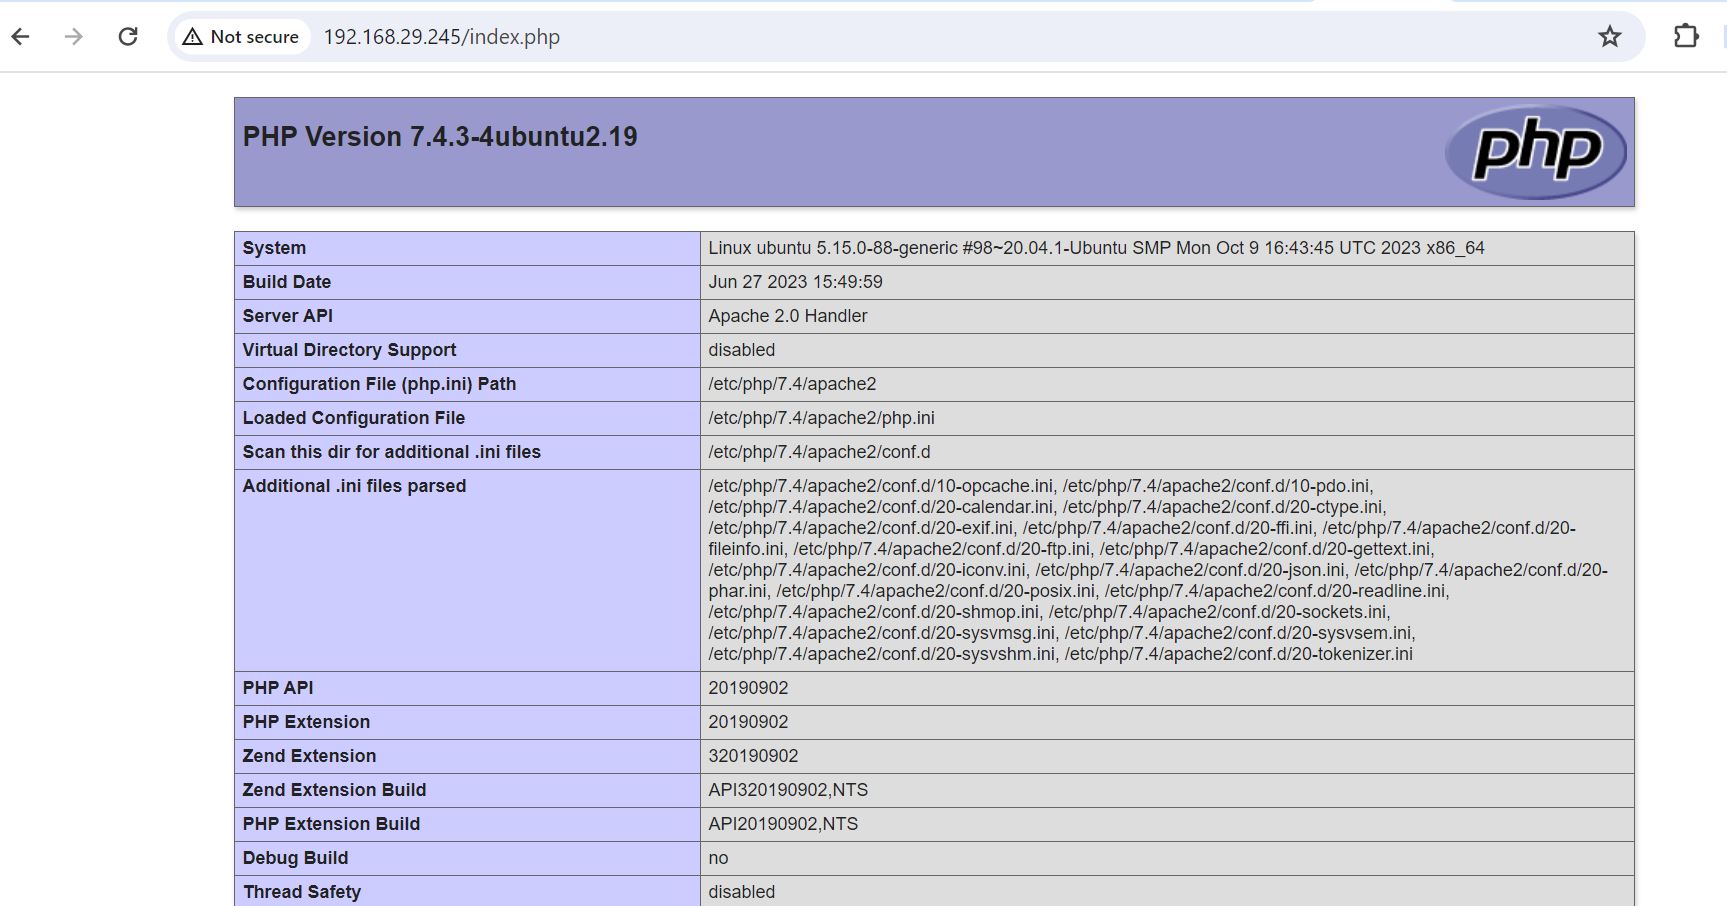
Now that PHP module is installed, let's run a sample php script on Apache server to check the working of module. We are going to write a php script using a function called phpinfo() in it. This function will show all the current php configuration in the system. Here is our php code for that:-
cyberithub@ubuntu:~$ sudo nano /var/www/html/index.php
<!DOCTYPE html>
<html>
<body>

<?php
phpinfo()
?>

</body>
</html>
Output
When you run the above code on apache server, you should see output like below in a web page.

