Table of Contents
In this article, we will go through step by step guide to create a MySQL Database in Google Cloud SQL. Cloud SQL is a fully managed database service which is offered by google cloud platform. This service can be used to set up, create and manage relational database on cloud platform. Cloud SQL can be used with MySQL, PostgreSQL and SQL Server. More on Google Cloud docs.
Step By Step Guide to Create a MySQL Database in Google Cloud SQL
There are multiple ways to connect to cloud SQL instance in GCP. In this tutorial, we will see how to create a SQL database instance in google cloud and connect to this instance through cloud shell.
Step 1: Prerequisites
a) You should have valid Google Email ID and Password.
b) You should have required IAM access to create an Instance.
c) Cloud SQL API should be enabled.
d) You should have Google Cloud Bucket access to store the data.
Step 2: Create a MySQL Instance
We will first create the SQL instance by following below steps.
- Open cloud console
- Select “SQL” service
- Click on "Create an instance"
- Select database engine. (In this case we have selected "MySQL") like below.
 You need to fill all the required details and finally click on
 "Create Instance". Here we are creating an instance called sqlinstance of type MySQL 5.7 as shown below.

Step 3: Connect to the Instance
Now that SQL instance has been created, we will connect to this instance through cloud shell. Follow the below steps to do so.
- Open "Cloud shell".
- Connect to the instance using below command
cyberithub@cloudshell:~ (cloud-build-322498)$ gcloud sql connect sqlinstance --user=root
API [sqladmin.googleapis.com] not enabled on project [1078829015898].
Would you like to enable and retry (this will take a few minutes)?
(y/N)?  y
Enabling service [sqladmin.googleapis.com] on project [1078829015898]...
Operation "operations/acf.p2-1078829015898-2acd5173-695a-4e38-8d27-a04b756a15e0" finished successfully.
Allowlisting your IP for incoming connection for 5 minutes...done.
Connecting to database with SQL user [root].Enter password:
Welcome to the MySQL monitor.  Commands end with ; or \g.
Your MySQL connection id is 895
Server version: 5.7.33-google-log (Google)

Copyright (c) 2000, 2021, Oracle and/or its affiliates.
Oracle is a registered trademark of Oracle Corporation and/or its
affiliates. Other names may be trademarks of their respective
owners.

Type 'help;' or '\h' for help. Type '\c' to clear the current input statement.
mysql>
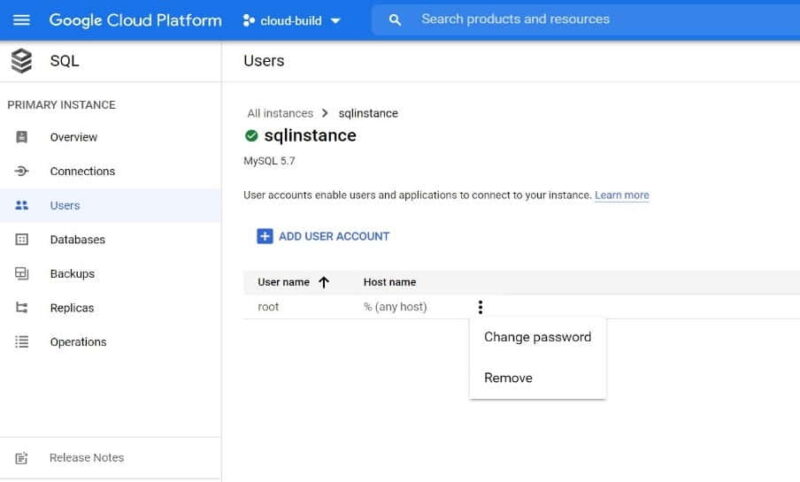
If for any reason password doesn't work, you can change it from Users menu. You need to locate your user and then click on three dot to change the password.
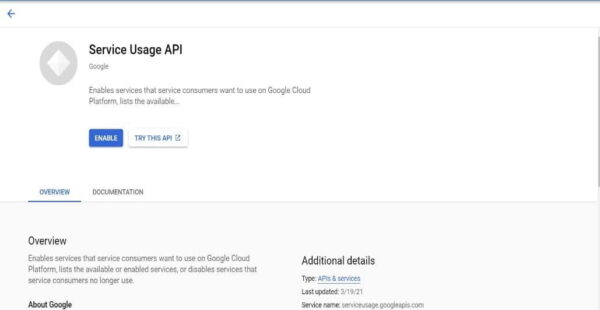
Sometimes you may see "serviceusage api is not enabled" error. To resolve this error, Just go to the API dashboard and enable the service like below.
Step 4: Create a Database
Once we are connected to the SQL instance, we will first create a mysql database and then a sample table in it. Here we are creating a sample database called Demo_Data using create database Demo_Data query. You can also choose any meaningful database name as per your convenience.
mysql> create database Demo_Data;
Query OK, 1 row affected (0.20 sec)
Step 5: Create a Table
To create table inside Demo_Data database, you need to first switch it to this database using use Demo_Data query.
mysql> use Demo_Data;
Database changed
Then create a sample table called Employee using create table query as shown below. This table will have three columns: EmployeeName, EmployeeID and EmployeeRole, with EmployeeID set as the Primary Key.
mysql> create table Employee(EmployeeName VARCHAR(20), EmployeeID INT NOT  NULL  AUTO_INCREMENT, EmployeeRole VARCHAR(50), PRIMARY KEY(EmployeeID));
Query OK, 0 rows affected (0.23 sec
Once created, you can do show tables to check the created tables.
mysql> show tables;

+-------------------------------+
|     Tables_in_Demo_Data       |
+-------------------------------+
|            Employee           |
+------------------------------+

1 row in set (0.20 sec)
Now you need to Insert some data in the table using insert statement.
mysql> insert into Employee(EmployeeName, EmployeeRole) values("Alex", "Engineer");
Query OK, 1 row affected (0.20 sec)

mysql> insert into Employee(EmployeeName, EmployeeRole) values("Bore", "Analyst");
Query OK, 1 row affected (0.20 sec)

mysql> insert into Employee(EmployeeName, EmployeeRole) values("John", "Manager");
Query OK, 1 row affected (0.20 sec)
After successfully inserting the data, if you now query the Employee table using select * from Employee query, it will show all the table data like below.
mysql> select * from Employee;

+--------------+------------+--------------+
| EmployeeName | EmployeeID | EmployeeRole |
+--------------+------------+--------------+
| Alex         |          1 | Engineer     |
| Bore         |          2 | Analyst      |
| John         |          3 | Manager      |
+--------------+------------+--------------+

3 rows in set (0.19 sec)
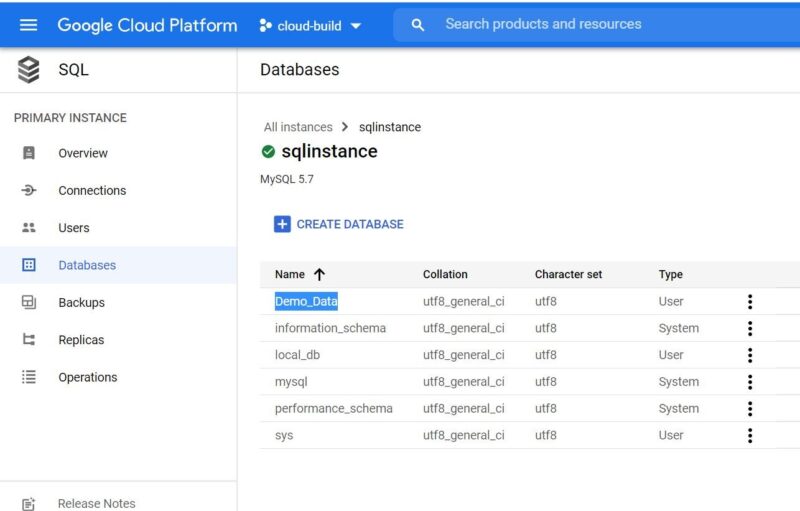
We have successfully created our MySQL database in cloud SQL instance. We can verify the same by checking under Databases section like below:
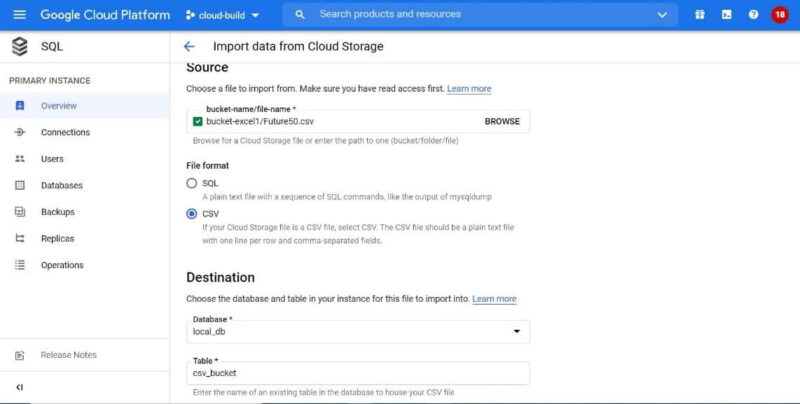
If you want you can also import files either in CSV or JSON format in the SQL instance by following below steps.
- Click on
“Import”to import the file. - Fill in the details and click on
“Create”. Remember table name here should be an existing one.
We have stored a csv file in storage bucket so we are importing directly from this bucket.
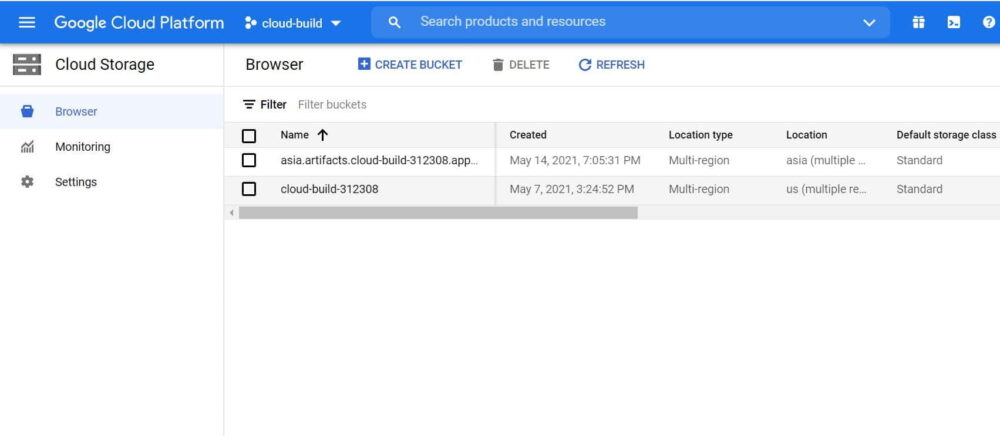
Once created, you should be able to see your file stored in the bucket like below.
