Table of Contents
In this article, I will take you through the steps to create your first Virtual Machine in Google Cloud. Google Cloud Platform (GCP), offered by Google, is a suite of cloud computing services that runs on the same infrastructure that Google uses internally for its end-user products, such as Google Search and YouTube.
Alongside a set of management tools, it provides a series of modular cloud services including computing, data storage, data analytics and machine learning. Registration requires a credit card or bank account details. After registering google allows you to create free cloud virtual machine and use it for few months. It is important to note that google cloud free vm comes with limited resources on Trial Account. So if you are creating google cloud free vm for practice or study purposes, it is better to keep an eye on your utilization.
How To Create a Virtual Machine in Google Cloud
In order to understand how to create a virtual machine in Google Cloud, you need to understand how google cloud vm works. In the below sections you will learn more on how to create a virtual machine. You can find more information about Google Virtual Machine on Google Virtual Machine Instances
Does Google Provides Free Cloud Virtual Machine?
Yes, Offcourse but upto a limited time period of 12 months as mentioned above, after that you will be charged for earlier used free Cloud Virtual Machine Services. Google Cloud allows you to use some of its resources including cloud VM on GCP Free Trial Usage basis. You can find complete information about free VM usage on Google Cloud Free Tier.

Step 1: Go to Google Console
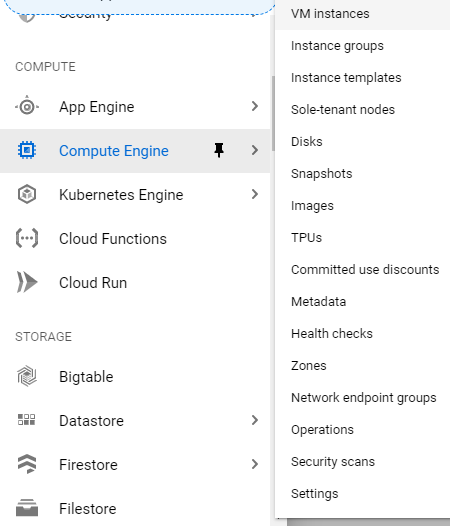
In Cloud Console, Go to Compute Engine and select VM Instances to create a virtual machine in Google Cloud.
Step 2: Click on Create Instance
Here, click on Create Instance option.

Step 3: Provide the Instance Details
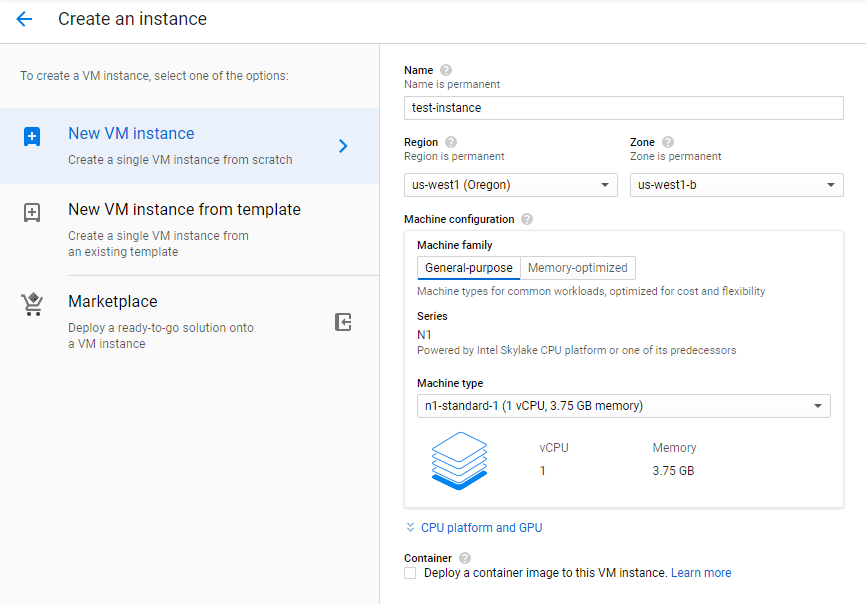
Provide the instance details as follow to create a virtual machine in Google Cloud:-
Name: test-instance
Region: us-west1(Oregon)
Machine Configuration: General-purpose
Machine Type: 1vCPU, 3.75 GB Memory
Step 4: Select the Boot Image
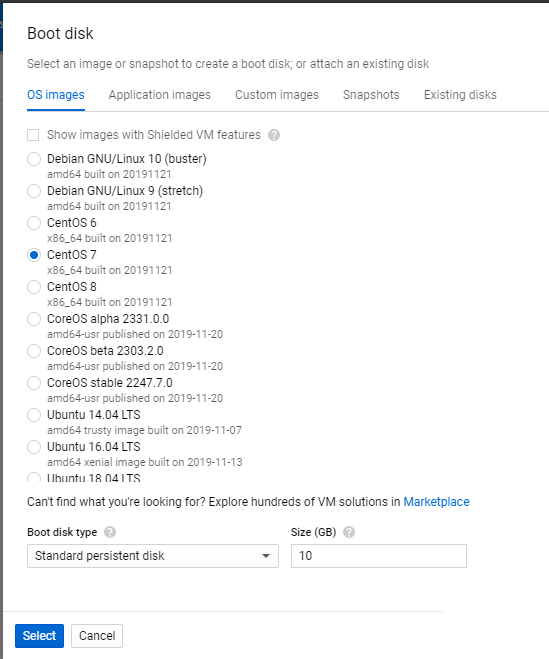
We will use CentOS 7 image with 10GB of Standard Persistent disk for our VM Instance. You can also select any of the snapshots/existing disks/Custom Images as per your requirement.
Step 5: Provide the Public Key(Required for Key Authentication Only)
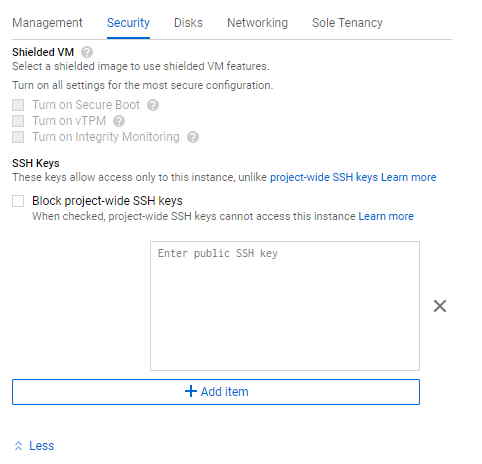
You need to provide the public key here if you need to enable key authentication.
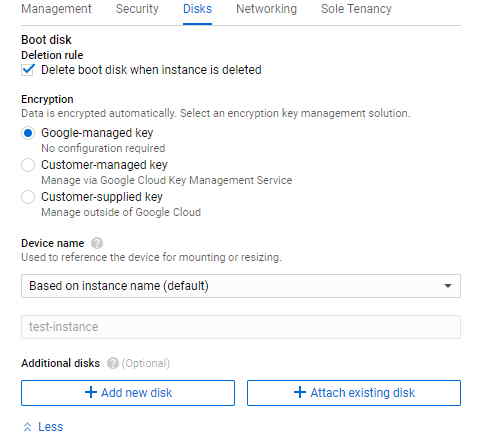
Step 6: Provide the Disk Details for Google Virtual Machine
You can create additional disk if you want from here. You can also select or unselect option of Delete boot disk when instance is deleted as per your requirement.
Step 7: Check Networking on Cloud Virtual Machine
Click on Networking tab and check if you want to add an extra interface on Cloud Virtual Machine. By default instance will have only one network interface. Here you can also see your default Internal IP. In my Case it is 10.240.0.0/24
Step 8: test-instance Cloud VM Created
After Clicking on Create, your first Virtual machine in Google Cloud is ready and you can now login to your VM using Public IP!!!!!!
Public IP: 10.43.256.8(In my case)
Also Read: Top 50 Chef Interview Questions
References: Google Cloud
Wikipedia
