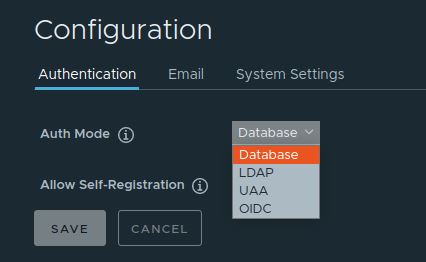
In this article, we will see how to fix Harbor Auth Mode which sometimes shows in disabled mode. This is a very common scenario with all those users who has been using Harbor in default Database Auth Mode. The problem comes when you need to change the Authentication mode to anything but Database mode. Currently harbor supports four types of Authentication mode - Database, LDAP, UAA and OIDC. More about Auth Mode on official website.
After fresh installation, by default Harbor will have one user called admin and it uses Database Auth Mode to authenticate the user. Once you logged in as admin user, you will get an option to create new users. The moment you create a new user the Auth Mode will get disabled. Let's understand more about this problem using below example. But before that let's understand the different Auth Mode.
- Database Authentication: You create and manage user accounts directly in Harbor. The user accounts are stored in the Harbor database.
- LDAP/Active Directory Authentication: You connect Harbor to an external LDAP/Active Directory server. The user accounts are created and managed by your LDAP/AD provider.
- OIDC Provider Authentication: You connect Harbor to an external OIDC provider. The user accounts are created and managed by your ODIC provider.
Why Harbor Auth Mode showing Disabled ?
Also Read: How to Install Harbor on Ubuntu 20.04 LTS [Step by Step]
If you have logged in using admin account and trying to change the authentication mode then sometimes you will see the Auth Mode as disabled and you won't be able to change the authentication as shown below.
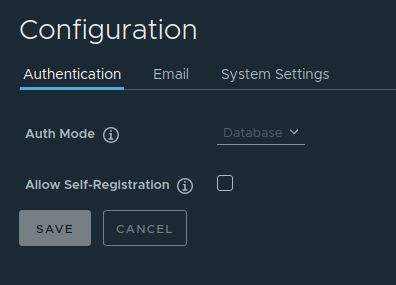
By default, the Auth Mode is set to Database which means all the credentials are getting stored in local database. If you want to change the authentication mode, then first you need to delete all the users you have created from the Administration->Users section. For example, in our case we have one user called cyberithub created as you can see below.
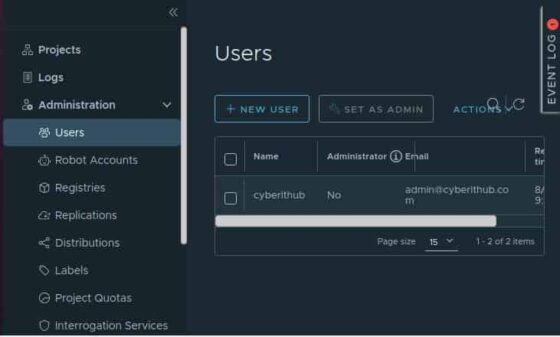
To enable the Auth Mode, you have to delete all the existing users except admin/anonymous. Since in our case there is only one user, so to delete this user we need to first select that user and then click on Actions->Delete.
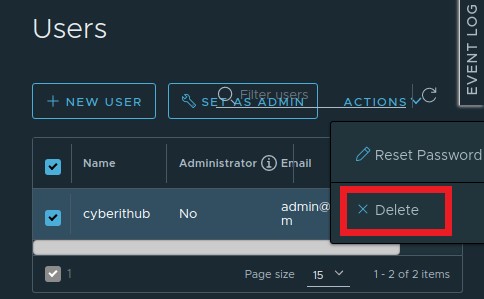
Once clicked on Delete, it will ask you to confirm your deletion as shown below.

After successful deletion, you will see below Deleted successfully message. Now you can see there are no users in the list.

If you now go back to Administration->Configuration and then to Authentication then you can notice that now we are able to select the Auth Mode. It is no longer disabled.
